Time to work on the wheel wells!
Before I get started, lemme tell you that I think the wheel wells are the most P.I.T.A. part of the model, both to design and to assemble, at least in my opinion. Not only do they get in the way of fuselage formers/fillets, they also sometimes span two separate objects (e.g. fuselage and wing), AS WELL AS formers/fillets.
But somehow, I don't feel I've designed a complete model if I don't put those wheel wells in. So I just treat it as a necessary evil.
So here we go.
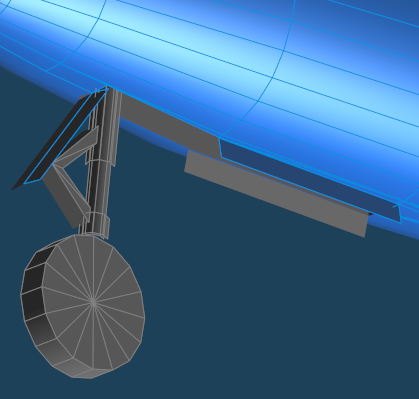
Let's start with the front landing gear wheel wells. In the picture above, you'll see that I've created the front landing gear. I've intentionally lengthened the gear shaft because I'll be "snipping" off part of it later when the wheel well is done.
I then simulated "raising" the landing gear up so that I would more or less get an idea how big a wheel well I need to carve out. So as not to mess up the position of the original landing gear, I cloned it. I then did a local rotate on the cloned landing gear and placed it on it's "raised" position.
Next, I created a "shape" that I'll use to carve out the wheel well.
Here's how the front wheel well template looks like. To carve out the wheel well, I'll need to subtract this template from the FUSELAGE using the BOOLEAN operation.
And here's how it looks like (after cleaning up the residual mess that BOOLEAN left behind, of course :-P ).
Making the landing gear covers involves a little bit more work. I'll need to get the surface of the FUSELAGE where it intersect with the wheel well template. The easiest way I've found is by using the BOOLEAN INTERSECT function. The image above shows the result of the operation.
But I want just the covers, so I deleted the other parts of the object. I then split the two faces above into two separate objects.
Using the local function, I relocated local coordinate center axis, then I did a local rotate along the local X-Axis.
Finally, I did the same for the rear part of the wheel covers. For this one, I rotated along the local Z-Axis.
And here's how it looks when completed.
The process for the rear wheel wells is basically the same. But I'll do that one in a later update.
That's it for now.


No comments:
Post a Comment